Photos and Videos
3.2 - Creating
Activity 1
The Best School Day Ever
In their younger years your pupils will have had plenty of opportunities to record video clips, but will never have edited them into a larger project. In Year 2, they will create a trailer for a movie - don't worry, this is very easy as long as you have an iPad.
Prepare:
- Check how much video recording experience your pupils have from previous years. Look at the Year 1 activities and consider whether your pupils need to redo them before tackling this activity.
- Ensure you have iMovie installed on your iPad (this is free for any iPads bought in the past 4 years).
- Play around with the Trailer function by starting a new project and selecting 'Trailer'. The best way to prepare is to follow the steps below to create your own trailer.
- Find 3 or 4 appropriate movie trailers on YouTube to show during your introduction.

Activity Tasks:
- Tell your pupils about this fantastic new movie that's being filmed showing how much fun children have at school. Show them your movie poster.
- Explain that they have been asked to create a trailer for the movie. Ask what is a trailer, and show your examples.
- Model how to open iMovie and create a new project. Select 'Trailer' and show some of the available themes. Select an appropriate one.
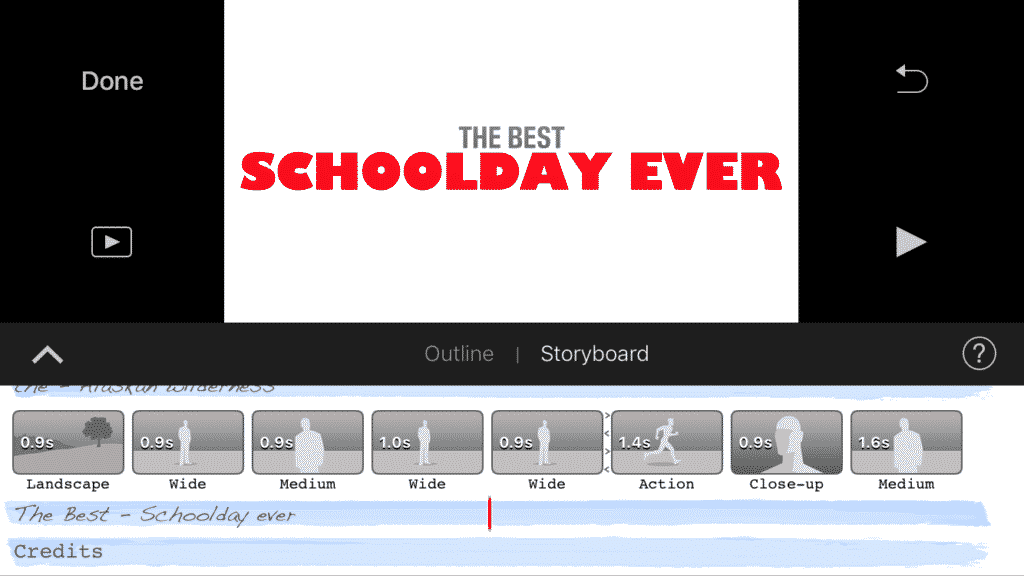
- Don't worry about editing the credits, except for the 'Movie Name' field. Click on 'Storyboard' to begin filming.
- Point out how each space for a clip has a specific time slot, and they're all quite short in length. The images for the clips also show the type of shot they want (landscape, close up, medium, wide or new character).
- Film a couple of example clips and then, in groups, let your pupils start creating their trailers.
- Depending on your pupils' ability, you can then show them how to edit the titles between clips or fill it in for them.
- Make sure you have time to watch the trailers together as a class.
Remember:
- Videos are made to be watched. Make sure your pupils get to show their trailers to the class, otherwise they may feel their time was wasted.
- Remind your pupils of the golden rule - hold the iPad in landscape mode, not portrait mode, when filming.
Activity 2
Photo Editing
Most of the images we see in print or on TV these days have been digitally altered (or 'photoshopped'). This is a task that requires a lot of skill and professional training, but we're going to attempt a simple version in this Year 2 task!

Prepare:
- The best way to prepare is to follow the steps below to edit your own photo before you teach this activity.
- In a previous lesson, ask pupils to take a few photos of a toy dinosaur, soft toy or doll with a blank white background (large sheet of paper). They should then look at their photos and select the one they think is best, deleting the others. You should then upload and save the image so it can be accessed from a computer.
Activity Task
- Model how to log into a program that lets you paint over photos (2Publish 'Book Cover' in Purple Mash, J2E5 through Hwb).
- Upload a photo from the computer
- In 2Publish just click on the plus sign in the top right corner of your book cover.
- In J2E5 click on the image icon at the top, then the red plus on the right side and then on 'Choose File'.
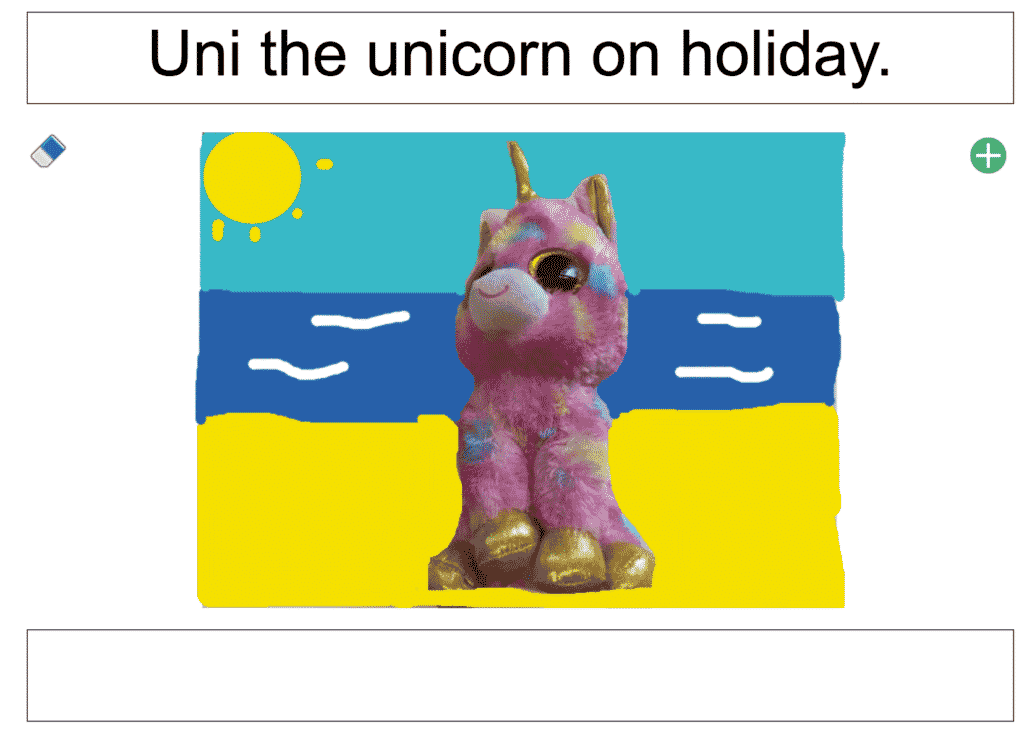
- Use the painting tools to add a background to the photo (e.g. grass and sky). The more imaginative the better.
- Ask pupils to add and edit their own photos, but be ready to help them with uploading the photos.
Editing Photos in Purple Mash
Editing photos in J2E
Remember:
- Editing the photos is the skill we're focusing on here. You can help with uploading the photos, although encourage them to do as much as possible themselves.
Enhanced Provision
Keep the Cameras Rolling
Whilst those two lengthy activities will take a lot of work, pupils should be taking photos and recording videos and voice at every opportunity throughout Year 2.
Photos
- Encourage pupils to take photos regularly. You are likely to need photos of most activities for evidence purposes so why not have a weekly class 'Photo Monitor' who can help out?
- Have a selection of photos with white backgrounds saved so that pupils can try editing the background during their independent time.
Videos
- During PE lessons that involve groups doing different activities and moving from one to another, have one station be the 'Video Recorder Station' where the pupils video pupils in other groups. This works even better if they immediately show the video to the pupil featured in it so that he / she can quickly review their performance and improve it on the next attempt.
- Film their partner explaining how they solve a maths question,
- Every Friday, pupils film each other explaining what was the best part of their week. Remind them to stop filming after a maximum of 15 seconds.
- Let them create trailers independently, once they've learnt how of course.
Voice Recording
- Show your pupils how to use a voice recording app on the iPads (e.g. Voice Recorder). Ask them to record their group's conversation when discussing a certain task.
- Voice recording apps such as Yakit Kids and Book Creator lend themselves to any topic (and kids LOVE to use them!) Make sure there are enough iPads available for pupils to use such apps as often as possible.
