Menu

Word Processing

3.2 - Creating

Intro

Word processing is one of the elements of 3.2 'Creating'. It's all about creating and editing text.

In Year 3, we mainly focus on changing the look of typed work by changing font, colour and size and also adding images. We also keep improving their saving and opening skills and focus on a few key buttons such as Caps Lock.

Framework

3.2 - Creating

  • Create and edit multimedia components in one or more languages
  • Organise a range of text, image, sound, animation and video for selected purposes.

Skill by Skill

  • Begin to use a word processor (Google Docs/Word).
  • Understand the difference between Caps Lock and Shift.
  • Become selective about printing.
  • Insert images from a file and from the web.
  • Use End and Home to move to the beginning and end of lines.
  • Change font type, size and style.
  • Insert images and icons to enhance work
  • Highlight text, and use cut, copy and paste.
  • Select appropriate filenames, open work, edit and save again.
  • Accept an invitation to collaborate on a document and edit at the same time.
  • Save locally independently with a suitable filename. Begin to save to the cloud.

(EAS ICT Skills Framework)

Vocabulary

highlight     insert     copy     paste     cut     formatting     file names     font    text

Activity 1

Improving Nursery Rhymes

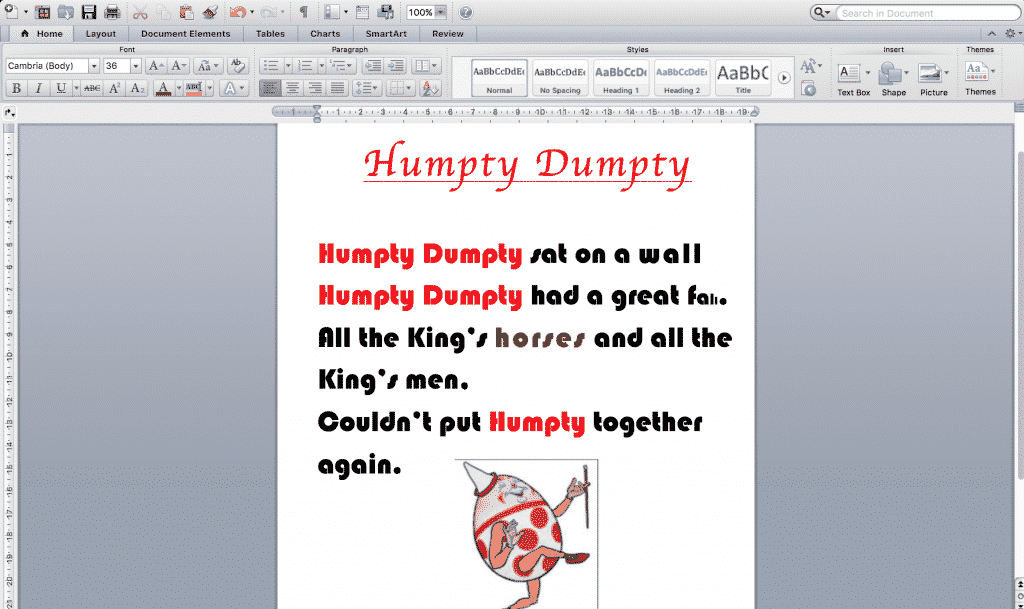
humpty dumpty word

This is a simple activity which focuses on the skills of creating and editing text. The children will choose a nursery rhyme, type it up (using Word or Google Docs) and then improve the work by changing the font, colour and size of text and adding images.

Prepare:

  • Ensure the children know or have a copy of various nursery rhymes
  • Save some relevant pictures in a folder on the computer/server
  • Prepare a folder for them to save their work into.

Activity Tasks:

  1. Type up a nursery rhyme in a word processor (Word/Google Docs)
  2. Make the title special, either by changing size, colour and font or by using WordArt.
  3. Highlight the whole work and change font, colour and size.
  4. Use some creativity to change size, font and colour of certain words (and the title)
  5. Insert an image from a file and then copy and paste your own images from the web.
  6. Save into the correct folder with an appropriate filename.

Remember

  • Teach them the difference between Caps Lock and Shift
  • Show them what the End and Home buttons do (if on a Windows machine)
  • Hammer home the message that we don't print everything, only finished work that we want to display.
  • Discuss the difference between saving on the computer (locally) and on the server (network). Maybe even take them to see the school server so they appreciate what it actually is.

Success Criteria

  • I can change the colour, size and font of text.
  • I can insert images from the computer and the web.
  • I can save my work in the right folder with a good filename.

Other Framework Elements

1.3 - Digital Rights

You can have a discussion about copyright of images online and how we should give credit

2.3 Storing and Sharing

Teaching your pupils to save the work in the right folder, with an appropriate filename, saves you so much time down the line! Remember to teach them to open as well as save.

3.1 Planning, Sourcing and Searching

Discuss what keywords to use when searching online for images.

3.3 Evaluating and Improving

Your usual peer-assessment and/or self-assessment.

Vocabulary

font     highlight      text     cut     copy     paste     caps lock     shift     inserting     image     filename     folder

Variation Ideas

Clearly the nursery rhyme aspect of this task can be amended to whatever your current topic. They could be typing up idioms, definition of topic keywords or be writing their own poems. Just keep the typed work short so that they can focus on the formatting and designing skills.

Activity 2

Writing an E-book

Whilst we usually think of typing text on a computer or laptop, it's important that we also teach the same skills on a touchscreen such as an iPad. In this activity the pupils create a simple e-book using an app such as Book Creator.

Prepare:

  • The purpose of this task is to teach the technology of creating an e-book. The pupils should therefore have researched the topic of their e-book beforehand or have fact cards available.
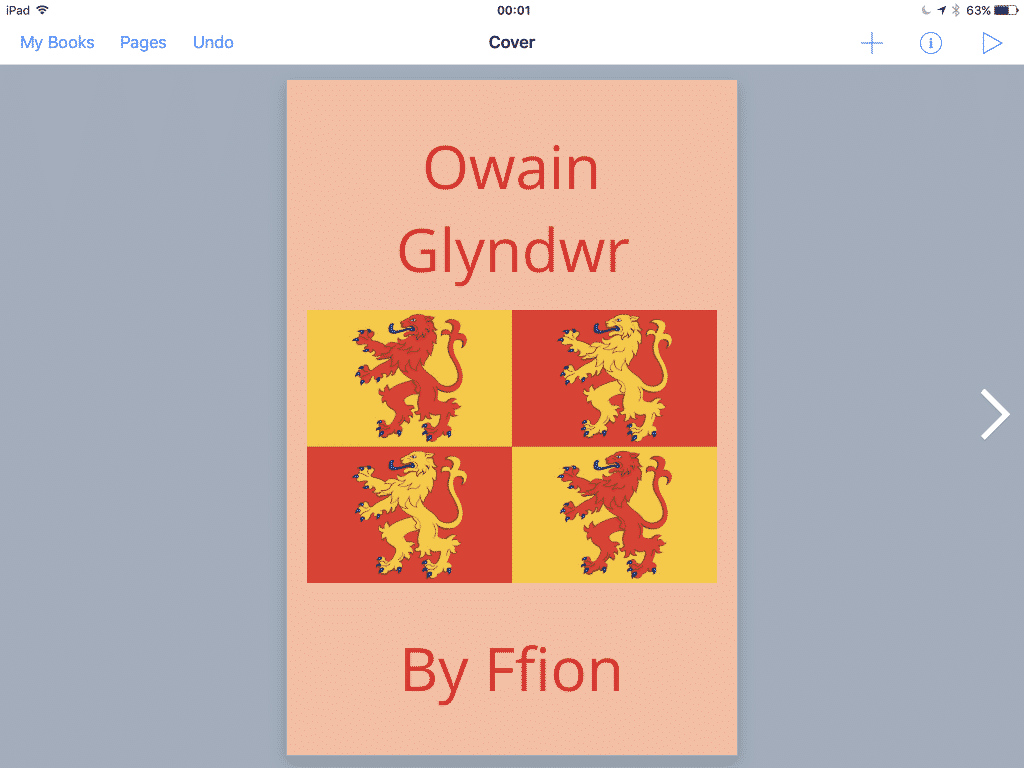
book creator

Activity Tasks:

  1. Introduce your e-book creating app (our preference is Book Creator). Explain that an e-book is like a book but only visible on a mobile device.
  2. Show them how to start a new book and add text as a title.
  3. Change the size, font and colour of the title.
  4. Add a background and frame to the text.
  5. Add an image, either with the camera app or from the internet (if they have learnt how to do this).
  6. Highlight the title, copy it and then paste it onto the next page.
  7. On every page, insert a picture and some text (descriptive words, caption or short paragraph depending on ability).
  8. Give your book a file name and, when finished, export it to iBook as an e-book.

Remember

  • Highlighting, copying and pasting is harder on iPads than on a computer. They need to be taught this skill.
  • Save an image from a web search into your camera roll by holding your finger steady on the image and choosing 'Save Image'. This is a vital skill to teach as it's needed for so many iPad based projects.
  • e-Books can be printed (although obviously videos and sound won't work) but cannot easily be opened on a computer. Export them to OneDrive, Google Drive or Dropbox to ensure they are saved somewhere where they can be displayed and opened again on other iPads.

Success Criteria

  • I can add text to a blank e-book.
  • I can edit the colour, size and font of text and place it where I want it.
  • I can insert pictures into my book from the camera and from the web.

Other Framework Elements

1.1 - Identity, Image and Reputation

There is scope here to discuss the need for permission before using photos of others in your work.

1.3 - Digital Rights

You can have a discussion about copyright of images online and how we should give credit if you use any in your work. You can also explain the watermarks on some images in Google Search.

3.1 Planning, Sourcing and Searching

Discuss what keywords to use when searching online for images.

3.3 Evaluating and Improving

Your usual peer-assessment and/or self-assessment.

Vocabulary

font     highlight      text     cut     copy     paste     drag     resize     insert     image     ebook

Variation Ideas

Once pupils have learnt the basics of creating an e-book, they can regularly use the skills to quickly create e-books to show what they've learnt. They could also achieve the same skills using a comic book creator such as Comic Life.

Activity 3

Poster-making

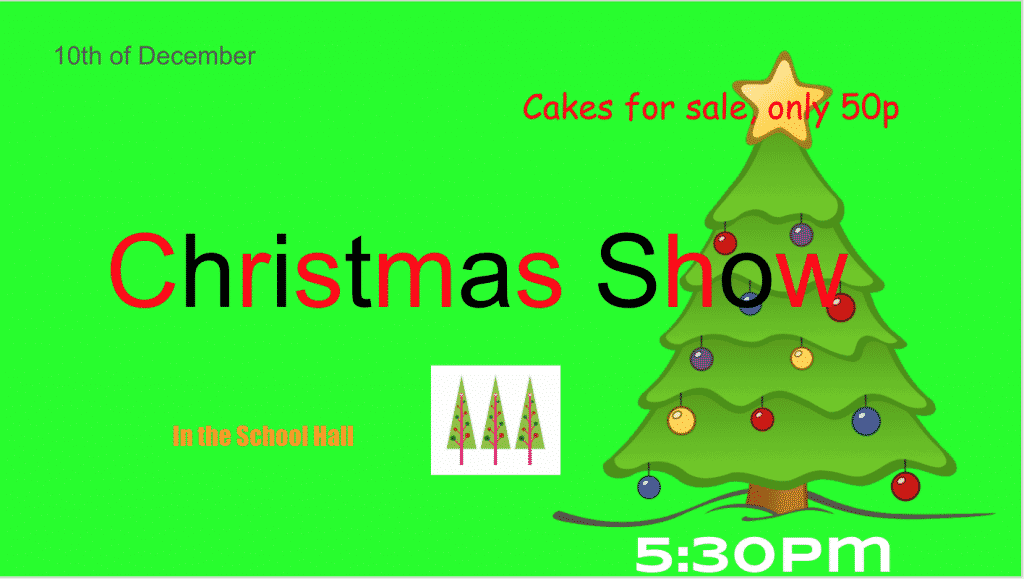
christmas poster

Posters can be created for any topic or event and making them is a great way to teach basic word processing. Whilst this is a very simple activity, make sure you concentrate on teaching the technical skills.

Prepare:

  • Discuss what information goes on posters.
  • Create a folder with a collection of relevant images they may want to use.

Activity Tasks:

  1. Look at some examples of the type of poster they might create.
  2. Using a publishing programme (e.g. Publisher, PowerPoint, Google Slides etc.) create multiple text boxes and type in the relevant information.
  3. Edit the colour, size and font of each text box.
  4. Add images direct from the web and from a saved folder.
  5. Resize and move around the text boxes to make the poster look attractive and well balanced (similar colours, important information larger, no large empty gaps).

Remember

  • Teach them the difference between Caps Lock and Shift.
  • Show them what the End and Home buttons do (if on a Windows machine).
  • Hammer home the message that we don't print everything, only finished work that we want to display.
  • Discuss the difference between saving on the computer (locally) and on the server (network). Maybe even take them to see the school server so they appreciate what it actually is.

Success Criteria

  • I can change the colour, size and font of text.
  • I can insert images from the computer and the web.
  • I can save my work in the right folder with a good filename.

Other Framework Elements

1.3 - Digital Rights

You can have a discussion about copyright of images online and how we should give credit.

2.3 Storing and Sharing

Teaching your pupils to save the work in the right folder, with an appropriate filename, saves you so much time down the line! Remember to teach them to open as well as save.

3.1 Planning, Sourcing and Searching

Discuss what keywords to use when searching online for images.

3.3 Evaluating and Improving

Your usual peer-assessment and/or self-assessment.

Vocabulary

font     highlight      text     cut     copy     paste     caps lock     shift     inserting     resize     drag     image     filename     folder

Variation Ideas

You can easily change the type of poster to fit whatever your topic (e.g. event poster, warning poster, information poster). As an alternative to posters, how about inserting a picture of a book character and writing descriptive phrases in text boxes all around it.